Wednesday, April 6, 2011

Yes, I am back again!!

At last I have taken some pictures of some of the things I have been doing over the last week or so. Actually, the first is a picture frame I did ages ago after I came back from a few days in Melbourne. I got the wooden frame at IKEA. I covered the frame with TH tissue tape (what an amazing product), distressed it slightly with vintage photo distress ink to give it a little more depth of colour then coated it with mod podge to seal the tissue tape.
The flowers were made from music paper cut with the tattered florals die (again TH) and shaped into paper roses. I sprayed them with shimmer mist - red and gold, then layered them onto little branches punched from green card and sprayed with gold mist. The flourishes are cut with the TH flourishes die and layered onto the bottom of the frame along with sitcky pearls.

I had to make some Easter cards for the Card Making World Monthly Challenge.

The first one was done mainly using the Cricut. I used Make the Cut to do the egg shape, the shadow and the lattice topper. The letters were welded then cut and a shadow made as well.

 The corners were cut with a Martha Stewart Photo corner punch and the centre strip was cut using a Fiskars scalloped edge punch.

The background paper is from my stash!


 The second Easter card has a digital image from Tilly - Just Jenny with Easter egg and coloured using my copics. The background speckle stamp was one designed by Sue Law for a shop in the UK and I am loving it a lot! Thanks Zoe for sending it to me!!
 The background paper is by Kaiser Craft and the edge shape was cut using a TH edge die. I topped it with a green ribbon. The sentiment and the card were edged with rusty hinge distress ink.

Wednesday, March 16, 2011

Long time, no blog!

Hello again after a very long break. Things have been hectic since early February. First, we had a trip to Auckland with my mum to attend the dinner for the New Zealander of the Year Awards. Mum had been nominated for the Senior NZ'er of the Year and she was very keen to go to the dinner. Then 5 days later, she fell and broke her leg and ankle and was admitted to hospital in Christchurch. After some time there, she was assessed as requiring high level care, so we had to find a rest home for her to live in. Fortunately, a place was found that is very close to our home and she is now settled there. Much of the last three weeks has been spent getting her clothes organised and buying things that she will need there!

You are probably aware that we have had another very severe earthquake in Christchurch on Feb 22 which has devastated the central city and many suburbs on the eastern side of the city. This again has taken a toll - not just in buildings but also, many lives - to date about 165 people have been named as casualties with many thousands injured - some very seriously.

With all that has been happening, it is not surprising that I have not had a lot of time or inclination to be creative (apart from having to sort out my craft room after the earthquake!) so I have not had a lot to blog about. However, yesterday afternoon, a friend came over and we spent some time in the craft room, so hopefully, I will now get back into being creative.

This is a card I made for a friend on Card Making World NZ Crafters Group. The base was cut from the Cricut using an svg file from Make the Cut and the top layer was also included with the same file.
I stamped a Happy Birthday stamp from Rubbadubbadoo onto white card then cut with a nestie scalloped circle. The red and black shapes backing the top were also cut with the scalloped circle and embossed on the edges.
I cut red, black and white ribbon and attached that underneath the scalloped sentiment to add a little more interest.

Monday, January 31, 2011

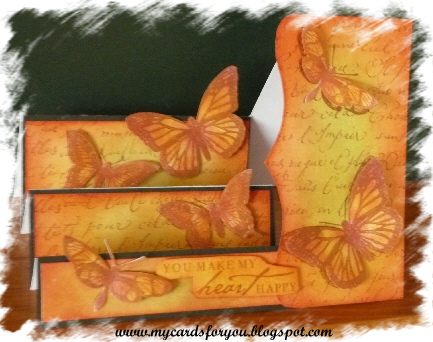
Butterflies

I was going through some of my Craft Stamper magazines the other day and found this card. I thought I would try it out because I liked the idea of using the different colours of distress inks together, but needed to do something with it.
I cut the base card (step card), then cut the layers. The layer on the side was cut with a Tim Holtz Edge die.
I used Bundled Sage DI to colour the centre of each of the layer pieces, then Wild Honey and Rusty Hinge, followed by Fired Brick on the edges. I love the way the colours blend so well and the red on the edges makes the rest of the colour really stand out.
I stamped the layers with a word background stamp and Rusty Hinge DI. The butterflies were from a Tanda Stamp set I bought last year. I stamped them on the layers then on another sheet and cut them out and coloured them with the same inks. The sentiment is from  Hero Arts.
I layered the coloured card with black before attaching to the base card.

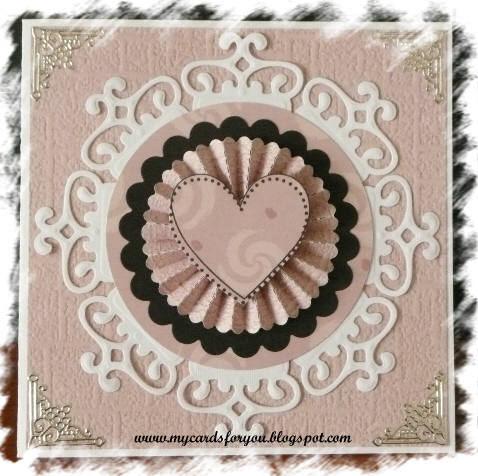
Wedding Anniversary

We celebrated our 38th Wedding Anniversary last week. Wow! Where have the years gone?
I saw Gina K demonstrating this great idea using nestabilities die cuts to make a frame for an image and decided to try it out.
I cut and embossed 4 shapes with the nestabilities tags die and cut each one in half. These were then placed around the edge of a circle that I cut with a circle cutter.
I made a rosette using Tim Holtz rosette die and topped that with a heart that I stamped and cut out. I placed this on a black scalloped circle that I had cut with a nestabilities die. To finish off the top layer, I added some silver peel-offs to the corners.

We celebrated by going to a nice restaurant for a lovely dinner!
Postscript (added 14th May 2011):
I also entered this card in the Papertake Weekly Challenge which was to use die cuts! All the embellishments on the card are cut with dies except the heart in the centre!

Friends

Friends need to be valued! Our theme for the CMW Monthly Challenge for February is Friendship/Love with a red and black colour scheme.


I made the embellishments for this card using my Cricut. The heart image was from the Make the Cut Gallery. I cut the red layer, then made a shadow for the bottom layer then off-centred the layers when I put them together to show a narrow band of black beneath the heart. I used Kindiglitz to highlight the swirls cut from the heart. The key was from SCAL and I added the word to it, welding it so that it cut together with the key. I added a shadow layer for the key as well.

The base card is white and I added a black layer then overlaid a red layer, half of the rectangle cut on the diagonal with  fancy scissors. I then ran it through the Cuttlebug with the Swiss dots folder. The ribbon was added just below the edge of the top layer. To finish, I added some bling to the top right corner.

The second card was made from a black base to which I added a red layer, run through the Cuttlebug (Swiss Dots again!) and overlaid with a black spotted ribbon.
The image is from Montarga, stamped with Versafine Black ink. I cut the image with a Nestabilities die, embossed it then inked the edges with weathered wood distress ink while it was still in the die cutter. This produced a nice clean edge to the image which stands out against the black background.
I used the same technique with the die cut for the sentiment. The sentiment tag was attached with square brads.

Thursday, January 13, 2011

I dared to embellish!

The theme over at the Tanda Teaser Challenge at the moment is Dare to Embellish! The idea is that you make your own embellishment for the card.
I have been intending to have a go at making paper flowers for some time, so this was a great opportunity. I cut 8 scalloped circles out of light green hand made paper with the smallest die in the set. I then screwed them up and damped them with a spritz of water. I then laid them on top of each other and fixed them together with a brad. Starting with the top layer, I crumpled each layer around the previous layer to make it look like the petals in a flower. I then sprayed the flower with red/gold cosmic shimmer over top of a silver shimmer. It came out really well! Don't usually put gold and silver together, but it worked here. The leaves are made with a punch and the sentiment is stamped with a rainbow pad to give multiple colours in the words.

I layered the card with some DCWV cardstock that I had punched with a corner punch and attached a ribbon across the bottom. The card on which the sentiment was stamped, was edged with a gold pen.

Craft Your days Away has an anything goes theme this week, so might put this one in there too!

Another Challenge

Card Patterns has a neat sketch for this week's challenge.
I chose a digital image from Tiffany Doodles for this one. I just loved the cute ladybug with the shoes and a cute face!
I coloured the image with copic markers and used a spellbinders scalloped circle die to cut it out. The edged shadowing was done with Bundled Sage distress ink, which I also used on the edges of the card. I layered the image onto a piece of red card that had also been cut with the Spellbinders scalloped circle die.
The background paper was a marbled paper that I found in my stash - not sure where it actually came from! I cut that into 4 squares and rounded the corners, then attached to a green background card. I then layered this onto a piece of red card.  The sentiment is from a Hero Arts set.