Friday, March 14, 2014

More inspiration from Craft Stamper


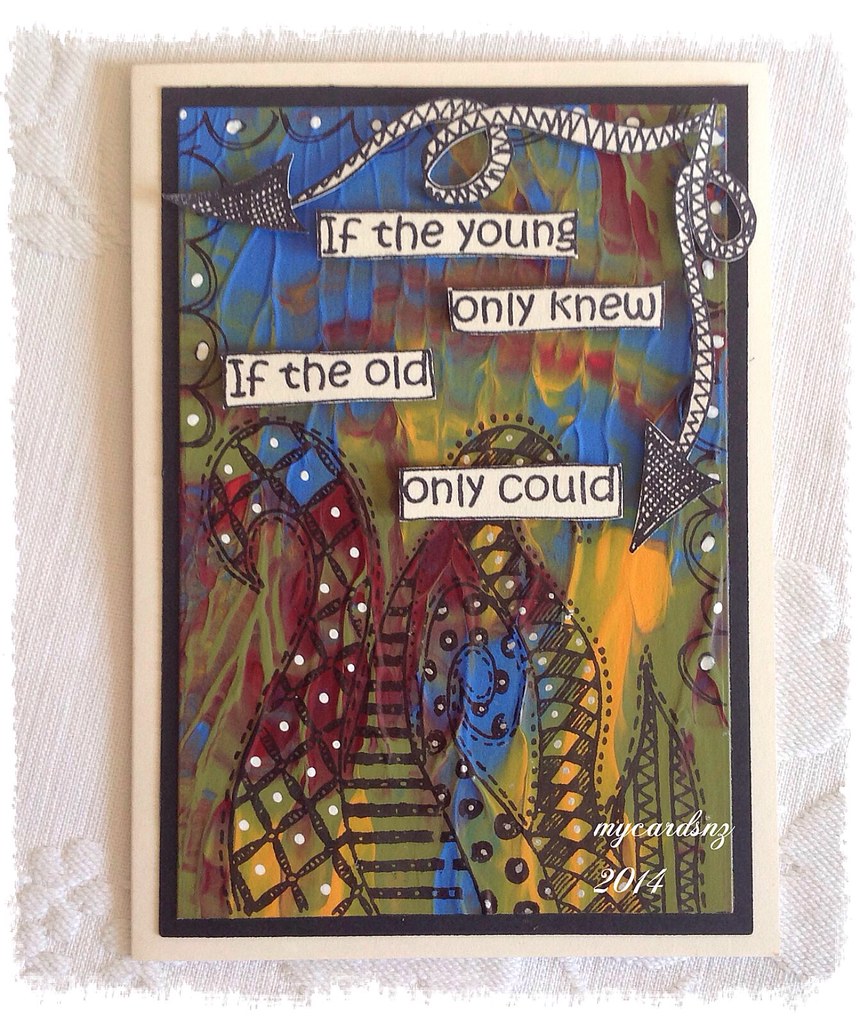
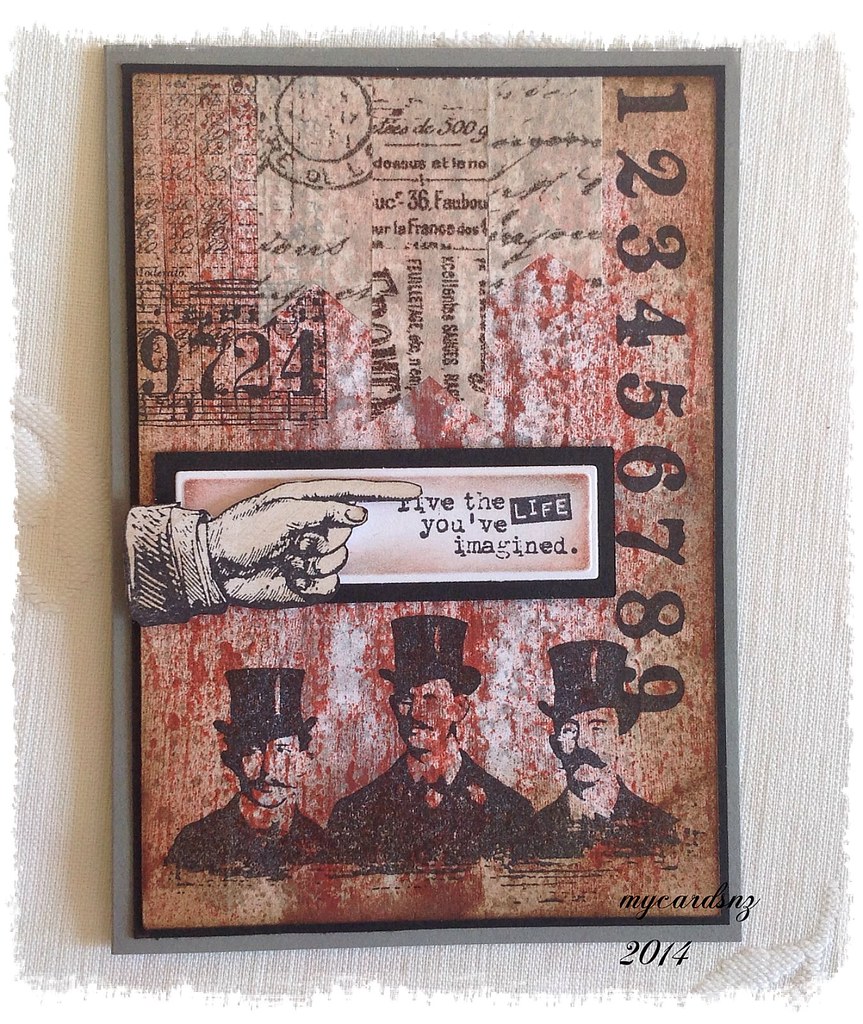
This card was made using the brayered distress stain technique described in the Craft Stamper magazine recently.

I used Fired Brick and Weathered Wood distress stains to layer the stain onto the background.
I then used Tim Holtz stamps and archival ink on the background. The background was edged with Vintage Photo distress ink.

I stamped the hand and cut it out then attached it to the sentiment which I layered onto the background card.

The card was finished off with some tissue tape attached to the top of the card.


- Posted using BlogPress from my iPad

Craft Stamper inspiration

This card was made using the inspirational article on mono printing in the latest Craft Stamper magazine. I have entered it into the latest competition over at their blog here.

I used one of my larger acrylic stamping blocks and put the paint onto that. I smoothed the paint around a bit then placed the card on top of the paint. Gave it a good rub then peeled it off. I left it to dry for a day before going back and making up the card.

For the card, I cut the painted card to size then stamped on it using archival ink and Dyan Reaveley stamps. Added a few bits with pens and cut out the curly arrows and the text then added them with foam squares.


- Posted using BlogPress from my iPad

Birthday Card


This week saw another birthday for my son and daughter. They were born on the same day two years apart!

I made this card for my son. We had bought a gift card for him and wanted a special card to put it into. The design is from Splitcoast Stampers http://www.splitcoaststampers.com/resources/tutorials/surprise_pop_up_card/


I had also put together a box album featuring our cute wee grand daughter. I called it A Day with Grandma and Grandad and we had taken the photos all on a day when we were doing lots of things with her.

I used the Cricut Mini Albums cartridge to cut the box pieces and sized the pictures to fit on the pages. I also added tiny magnets on the folding corners of the box to help the box stay together when it did not have the top on it.

The roses on the lid were all hand made using punched flowers and a glue gun!


Posted using BlogPress from my iPad

Tuesday, March 4, 2014

New Videos

I have been busy over the last couple of days editing a couple of videos for You Tube. They show how I put together the mini album with the travel theme that I made for my daughter recently.

I have posted them on the Videos page here on my blog so please take a look at them and hopefully you may get some ideas!

I will be putting up detailed instructions for the album as well.

Enjoy!

Sunday, March 2, 2014

Birthday Cards

Last week was our granddaughter's second birthday. We had a lovely family party with four generations present, including both sets of grandparents. Not often that happens as the other grandparents live in Scotland!

I made a couple of cards for the occasion.

For the first one, I used the new Pop Up Card Studio software to design a simple inner. The front of the card used a series of labels cut using Spellbinders dies and embossed them before layering on the card. The corner pieces are also from a Spellbinders die set. The image is from Paper Crafting World and I coloured it using copic markers and added glossy accents and kindiglitz to highlight certain things in the image.


-
For the second card, I used a printable set from The Printable Craft shop at Card Making World. The set is Fairies and Dragons. I used some background papers and one of the fairy images cut out along with the hearts, which I layered.


Posted using BlogPress from my iPad