Friday, May 15, 2015

Taste of Summer

This month at Close to My Heart, the Constant Campaign is for a pack of beautiful summery papers, all double sided and 2 of each design, Taste of Summer.
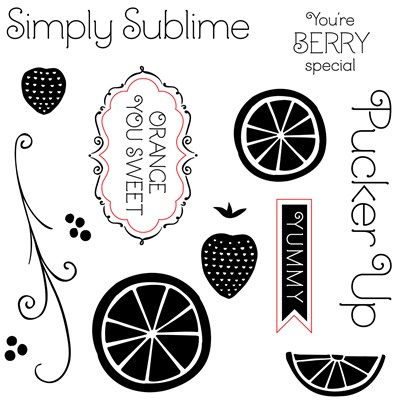


There is also a cute set of stamps that coordinate with the paper pack, making it a great resource for keeping summer memories in a scrapbook page or making a special summery card.


I decided to make a mini album using the paper pack - and I still had 4 sheets left after making the album so I will be doing some cards with those ones!


I have made a short video showing my latest creation using these colourful papers.


Enjoy and do let me know if you want some of these lovely papers or the stamp set before the end of May. 

Wednesday, May 6, 2015

Remembering

Over the last few weeks, we have, in New Zealand, been remembering the landing of New Zealand and Australian troops on the beach at Gallipoli in Turkey on 25th April, 1915. This was a disastrous military undertaking and thousands of soldiers were killed over a period of months.

I made this set of poppies and the frame to remind us of the sacrifice made by so many.


The poppies were cut using the Cricut Explore and the Giant 3D flowers cartridge. I cut the words from black vinyl and attached them to the glass front of a photo frame that I repurposed by sanding down, painting with black acrylic then rubbed with antiqueing wax.

Making Cards Again!

Given that Mother's Day is coming up pretty fast - this weekend, in fact, I had a burst of card making over the last week or so. I am using the Cricut Design Space program that is an on-line program for use with the newish Cricut Explore.

Some of these cards were made using the Artfully Sent Cartridge from Close to my Heart. I am really enjoying having this cartridge and the Cricut Explore makes it very easy to make these stunningly simple cards.


This card was made using the Design Space software. I love the crisp, clean cuts from this machine.


This gatefold type card was made using Design Space and a mixture of files available in the program.

I split the fence cutting file and attached it to a rectangle to make it fold into the centre. 


This card was a download from Monica's Creations. One of the beautiful four-fold cards available to download from the website, it is very elegant. I added a belly-band to keep it closed and cut the word and shadow with the Cricut.


This is a card I made from left-over card using Close to my Heart products. The stamp was the Stamp of the Month for April and is so versatile as there are about 16 different sentiments to stamp onto the typewriter image. The dotty card is Confetti Wishes with Lagoon cardstock layered on top of it.


The last one for today was a box card I made using an svg file from SVG Cuts - Box cards set. I used Confetti Wishes and Lagoon cardstock from CTMH along with flower stamps (Pretty Petals). I used CTMH Exclusive inks to stamp the flowers in Thistle, Lagoon, Pear, Smoothie and Honey. I was able to cut the flower shapes out with the Cricut using the Art Philosophy cartridge from CTMH and the Artfully Sent cartridge for the label on the front.


Wow, a long post today. Really enjoyed playing with these cards and the new inks and stamps from CTMH.


Sunday, March 29, 2015

Exciting News

I have been considering a move into the crafting business for some time and yesterday I decided to sign up to become a consultant for Close to my Heart, an international company specialising in scrapbooking and cardmaking products.

I have been impressed with the range of quality products available through CTMH, and since I have purchased my new Cricut Explore, I have been looking more at the Cricut cartridges available from the company. I plan to showcase some of the projects I have made with these cartridges in the near future as well.

I welcome any of my New Zealand readers and followers as customers - just click on the link in the right hand sidebar and it will take you directly to my on-line shop.

Fun times ahead!

Sunday, March 15, 2015

Making a textured background using a stencil

I went to a card making class recently to get some inspiration. One of the cards we made was one where we used a stencil and texture paste to make a textured background.

I was telling a friend about it and she asked for a tutorial so decided to make a short video showing how simple the technique is.

In the video, I used a gel medium to do the background but you can also use any sort of texture paste that will set to a firm pattern.


This card background is done with a gel medium on cream and black patterned paper. I also used frayed burlap distress ink to highlight the stencilled background.


The background on this card was done with home-made texture paste which was slightly coloured with a pinkish toned acrylic paint. Because this paste contains water, it does tend to cause the paper to curl when it dries, so it would be better to use a thicker card for the background.

I also did a bit of research on texture paste and found a recipe for making your own. A number of websites have similar recipes, but the one I used is as follows:

1/4 Cup baby powder
1 tbsp PVA glue
small amount of coloured acrylic paint (can use white or other colour)
Small amount of water.

Put the powder, PVA and paint into a small screw top jar and add the water in small amounts, stirring with a wooden stirrer as you add the water. It should be a thickish paste, fluid enough to be able to spread.

I used a commercially produced stencil for my examples but you could make your own stencils using die cuts or a cutting machine.


- Posted using BlogPress from my iPad

Thursday, March 12, 2015

Using Vinyl - first experiments

Since I bought my new Cricut Explore, I have been doing some vinyl cutting. While the Expression cut vinyl quite well, the detail that you can get with the Explore is quite amazing.


I did a couple of birthday gifts for my son and daughter - they share the same birth date. The first - a wine glass, was for my daughter. Quite pleased with the end result, but it is hard to get a straight line to attach to a rounded glass so that it is still straight. Will have to play around with slight curves - maybe Inkscape for designing.


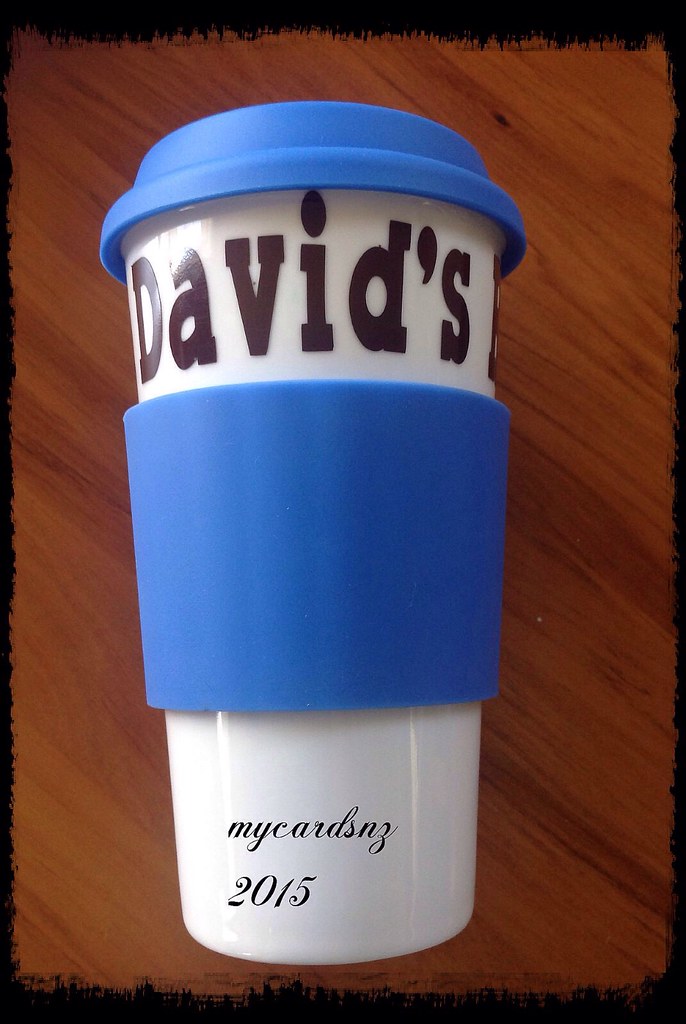
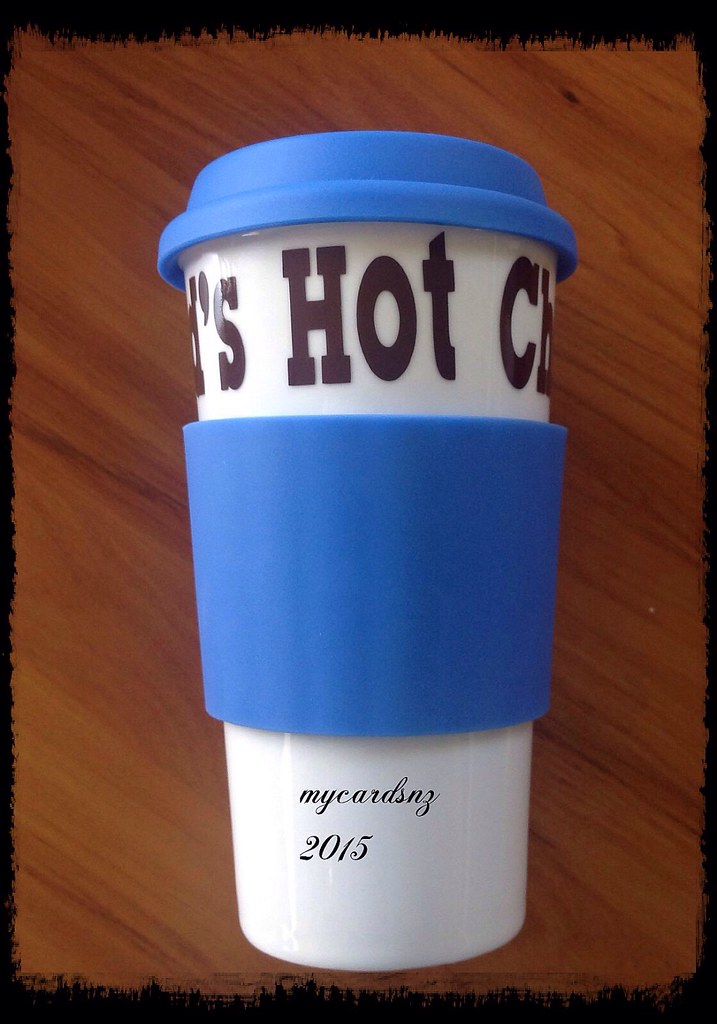
For my son, I picked up a ceramic travel mug and cut out his name and Hot Chocolate, as he drinks that at work. Very pleased with the end results with that one.


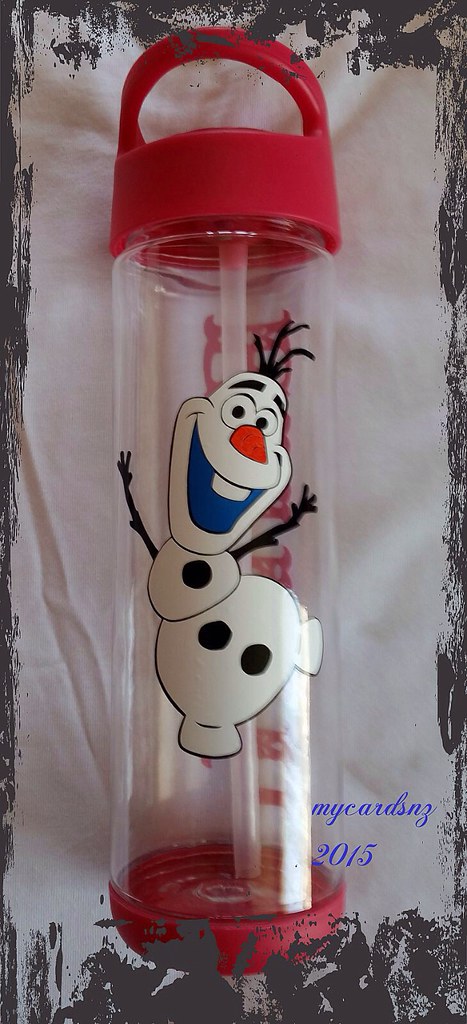
I also did a water bottle for my granddaughter's birthday. Used an image from the Frozen cartridge in Design Space. I had to layer the vinyl to get the image and was quite pleased with the end result. I added her name to the other side of the bottle.


Posted using BlogPress from my iPad

Sunday, February 8, 2015

Experiments!

If you have been following my blog recently, you will know that I bought a new Cricut Explore cutting machine a couple of weeks ago. I have fallen in love with it! Not only does it do excellent print to cut, the software is relatively easy to use and allows you to design your own projects using images that you own as well as being able to access 25,000 images on-line with the free 12-month subscription that came with the machine!

What have I done with it you ask? Here are some pictures of things I have made so far!

 This card is made using an svg file from Bird's Cards It is the Daisy card and I found it relatively easy to import the svg then sort out the different colours for it to cut on the machine.

Importing svgs into the Explore is not the same as using other cutting software, as the svg does not come in at the size it was designed to be. Hopefully, when Provocraft announces its updated software in a week or so, they have fixed this so you don't hae to fiddle round with the file!


This card and the one below feature images of girls and flowers titles which were cut using the print to cut feature of the machine. The images imports really well into the Cricut Design Space software, it allows you to size it to what you require and sends it to the colour printer with no problems that I have encountered so far.


I was most impressed with the quality of the cutting of these images.

I have not yet worked out if you can cut the images with a white border around them, sort of like a shadow layer. I will be working on finding this out!

These images came from the Printable Craft Shop  and they really are cute!


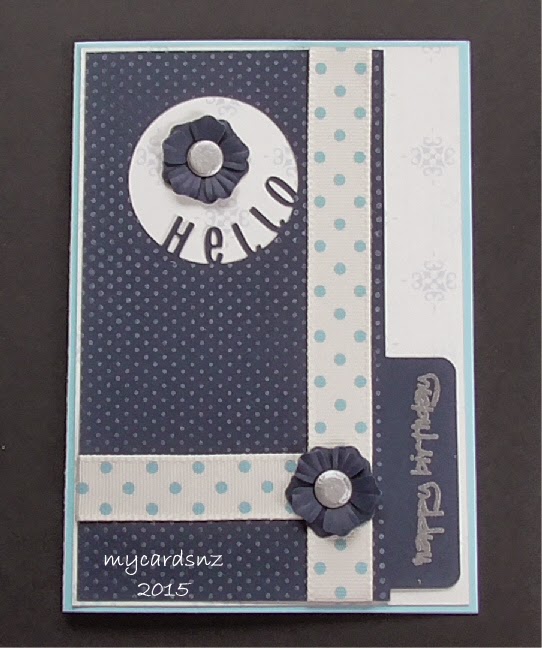
I saw a card like this recently in an Australian card making magazine and thought I could replicate it by designing a cutting file. With the Design Space software, it was quite easy to design the entire card. The blue part is a separate layer and has the circle cut out, but leaving the letters attached to the card. I stamped the layer with a dotty background stamp and white ink, and the sentiment is stamped and heat embossed with silver. 
 This card is a design in the Design Space files. I made a card using red foiled card and attached the top layer which was cut from white card.

Very simple, but effective!


I used a sentiment from the DS software to design this card. I found a label shape that I placed on the front of the card. Then I used the shadow layer for the sentiment to join the letters to the card and weld them together. I cut the base card, a shadow layer of the words in black then the words in white and red. To finish off the card, I used a strip embossing folder to make a debossed pattern at the top and bottom of the card.

I really had fun making these cards and playing with my toy!