Tuesday, February 11, 2014

More Wedding Cards

We had a family wedding at the weekend and I made these two cards for the brides! One was for my daughter to give to them.


This card was made using the Black Cat. I designed the lattice in SCAL3 and added the shadows for the letters and welded them in the lattice background. I cut the top layers of the letters in black then used glossy accents to add shine. Both the girls have been members of the NZ Women's Rugby team called the Black Ferns so I cut the ferns as well to add some detail. Was really pleased with the fine cut on the ferns. Finished the card using some silver foil paper under the lattice on the front of the card.


This card was done with the Cricut and used Fancy Frames and Art Nouveau cartridges.

It was a lovely wedding as well!

- Posted using BlogPress from my iPad

Friday, January 31, 2014

Clean and Simple Cards

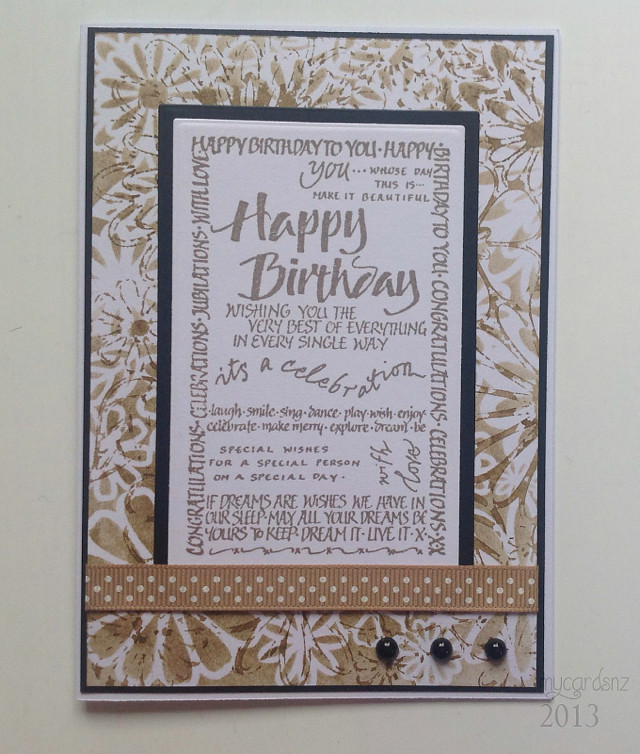
Have been doing a few cards recently and for a change, I made a couple of clean and simple ones.


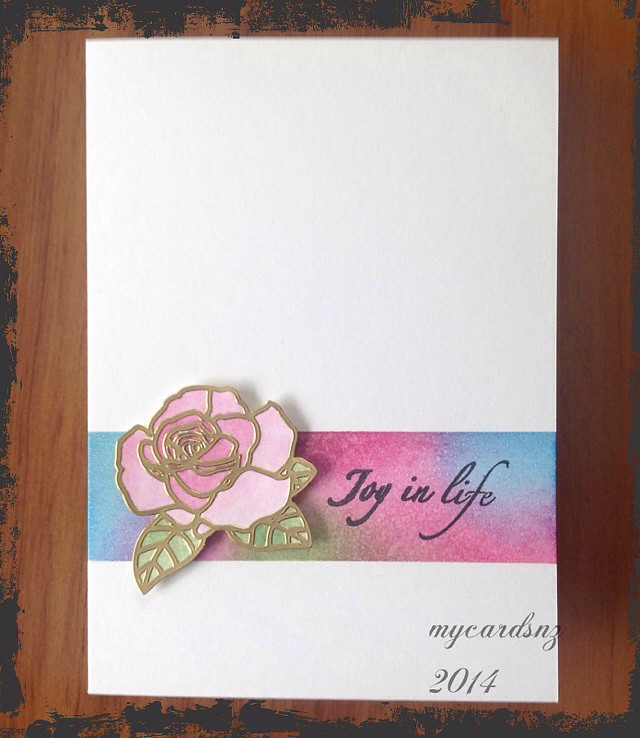
I have had a sheet of peel off stickers for ages that I did not know what to do with. I found it again when I had a clean out and decided to try this. I stuck the peel off rose onto a piece of card then coloured it using distress markers (Picked Raspberry and Mowed Lawn) and a water brush. It is easy to get the shading when you use the water brush, picking up the colour from the craft sheet, rather than using the distress marker direct to paper.

To make the coloured strip, I used wide post it notes to block off a strip on the front of the card, then used distress inks (Picked Raspberry, Salty Ocean and Mowed Lawn) to put the colour down. When I finished that I gave it a light spray with water to change the flat look of the colour.

The sentiment is from a freebie set in a magazine I got recently.


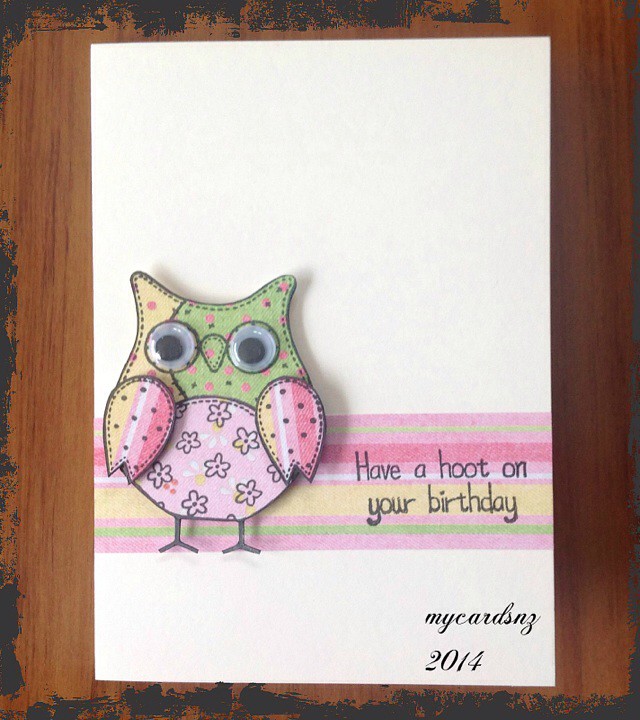
The second card, slightly less simple, but effective, used paper piecing for the image - something I have not done a lot of for some reason. I stamped the owl image on several different coloured sheets of paper and cut out the components, before attaching them to a stamped image on a piece of card. I cut out the owl and added eyes then attached the wings with foam squares.

For the sentiment strip, I cut a piece of the coloured paper used for the paper piecing and stamped the sentiment on that.

The owl is attached to the card with foam squares to give it some dimension. Both the owl stamp and the sentiment were freebies from a magazine I bought last year.

Over at http://simplylessismoore.blogspot.co.uk they are having a Clean and Simple challenge this week, so I thought these might be just the thing. Have not entered any challenges for a very long time, so what better time to start than in a new year!


- Posted using BlogPress from my iPad

Friday, January 24, 2014

Wedding Cards

Recently, I had to make some wedding cards for friends and these are the designs that I came up with.


This box card was based on an idea from a recent SplitCoast Stampers tutorial. It is a great card for a special occasion as it folds down flat for posting, then opens up and sits like a box for display!


This card was designed using SCAL2 and cut with the Cricut. I chose the font for the letters then made the background using the shadow feature. The card itself was designed by joining two identical pieces (one flipped to join its corresponding letter) and welding the pieces together in the software. I then made various layers for the letters. They are all cut from the same card and I used antique linen distress ink on the edges to make them stand out. I embossed the background layer with the swiss dots embossing folder. Added flowers and the die cut leaves for added interest.


For this card, I used a design from Penny Duncan Creations for the base card. The hearts were done using SCAL2 and cut with the Cricut. I used the pen tool in the Cricut to write the initials on the hearts.


My daughter was invited to the wedding of her next door neighbours recently and I did this card for her to give them. I used the Weddings cartridge and the Cricut Craft Room to cut the figures out. The backgrounds are die cut and layered onto a base card. The hearts in the corners were peel off stickers and I added some gold Smooch to highlight them.


- Posted using BlogPress from my iPad

Thursday, January 2, 2014

Mini Album with a Travel Theme

I recently completed this mini album for my daughter, who is on a month-long trip to India. She will have taken lots of wonderful photos and hopefully she will find this album useful to put them into.

I put together a short video of the finished product and will be posting a more detailed tutorial soon.


YouTube Video

- Posted using BlogPress from my iPad

Sunday, December 15, 2013

Voyager Box and Ultimate Organiser

Recently, I finished a project I had been working on for a while. I found the design at www.paperphenomenon.com for both the box and the Organiser and bought them to have a go! With the design you get the measurements for cutting and instructions for making them up. The designer, Kathy Orta Files, also has very good videos on YouTube showing each step in the process.

The photos show the finished box and the organiser that goes with it.


This is the organiser closed, showing the front cover and the closure, which is just a D-ring attached to a grosgrain ribbon using eyelets. The ring slips over a hitch post.


Inside the organiser, there are a number of fold out pieces that have pockets attached to the fronts, and have slide-in pockets on the sides. There are also envelope type pockets.


This picture shows the file top pockets/folders that are in the back of the organiser.


This is the back of the organiser with a pocket for the diary (below). The ribbon is attached to the back with a metal flower from Prima (one of the left-overs from the class I did with Finnabair earlier this year).


Really enjoyed making this project and hope to make some more of Kathy's projects soon.


- Posted using BlogPress from my iPad

Such a long time...

I have just realised that it is a very long time since I have blogged any of my recent work! I have actually been quite busy out in the craft room and have just not gotten around to adding anything to my blog.

While I was in the UK, I picked up some little calendar tabs at a craft shop and made some of them into little calendars.


To make the backgrounds, I used some coasters that I bought at IKEA (the round ones) and some blank coasters I have had in my stash for a very long time! I covered the square coasters with papers from my stash (again!) then matted the calendars and added some brads before attaching to the coasters. To make them stand, I used another coaster (again covered with paper), punched 2 holes and added ribbon to tie them together. This enables the coasters to stand up.

For the round ones, I cut some stands from the Fancy Frames cartridge on the Cricut and attached them to the back of the coasters. Added a cute doily that I cut using a Marianne's Creatables die before attaching the calendar.

For all of the calendars, I edged the coasters with vintage photo distress ink and added some flowers to each. These will make cute little gifts for Christmas Stockings this year.


- Posted using BlogPress from my iPad

Wednesday, October 9, 2013

Creative Chemistry 102 Day 2

Day 2 of CC102 focussed on using stencils - thank goodness I bought some while I was away!

Enjoyed playing with the inks, paints and stencils today and quite pleased with the results.


One of the stencil techniques today was one that I had used before. It was described in the last Craft Stamper magazine. Here are some of the cards I did using the same technique.


- Posted using BlogPress from my iPad

Location:Christchurch, New Zealand