Monday, September 23, 2013

Travel Mini Album

Before we went away for our trip to the UK, I made a mini album for the friend who was going to travel with us. This was her first trip to the UK so I wanted to help her to remember it with a special journal/album.
I have been very inspired by Anne at www.annespapercreations.com as she makes the most amazing mini-albums, specialising in using Graphic 45 papers.
Having watched many of her videos - which are fantastic as she goes through every step involved in making the albums, I decided to have a go at creating one for myself.
I took several photos of the finished album for my friend, and decided to make these into a video instead of putting every picture on the blog.
The papers I used were mainly from Kaisercraft and I used several Tim Holtz stamps and dies as well as using the Cricut to cut several little mini-books and folders to put into the album.


The video is short but it shows all the pages and inserts I made for the album. Each page has two different sides as well as an envelope between to insert a bigger mat for photos and journalling.

Wednesday, September 11, 2013

Back from a holiday!

Yes, I am back from my holiday. We were away for nearly a month and had a lovely time travelling around in the UK, visiting friends then to Paris for a couple of nights and a night in Los Angeles, where I had to visit Joann's to stock up on some craft supplies!

Finally got into my craft room in the middle of last week and made a start on some cards that I have been wanting to do for ages. The problem was that I was not that inspired and had to flick through a few magazines to get some inspiration.

Before we went away, I made gelli pad using a recipe I found on the internet. I tried it out and made some background papers that I was reasonably happy with.


For this background I used flesh colour and olive green acrylic paints. Was very happy with the end result. Used a new die to cut the grasses, stamped the dragonflies and added a birthday greeting.

For the next 2 cards, I used red, blue and yellow acrylic paints - quite a different end result!


I still have a lot of experimenting to do with this technique, but it is interesting and you can do some amazing backgrounds. I bought some stencils while I was away and I want to try using those to make the backgrounds a little more textured and interesting.


- Posted using BlogPress from my iPad

Location:Avonhead,New Zealand

Wednesday, July 10, 2013

Slider Card Tutorial

At a recent Crafty Girls meeting, we made a slider card and I promised to put the tutorial on the blog. Here it is:

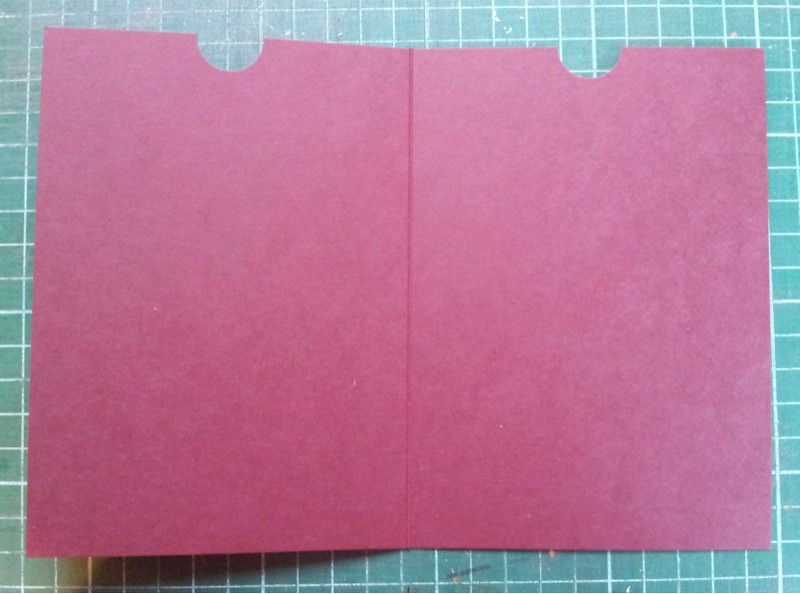
1. Take a piece of A5 (half an A4 sheet) cardstock and fold. Punch a half circle from the centre of the top of each half of the cardstock.


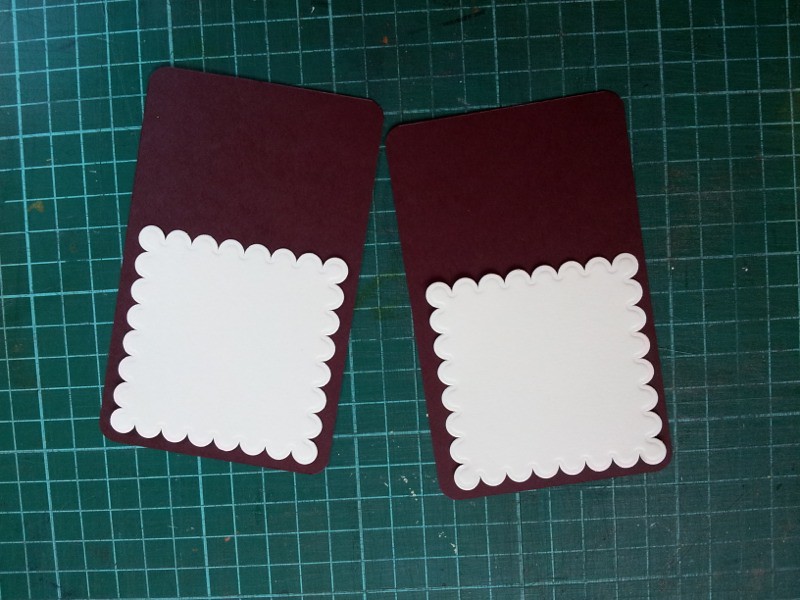
2. Cut 2 pieces of the same cardstock approx. 7.5cm x 12cm. These will be the pieces that slide in and out and will be decorated. Only about 2/3rds of the slider will actually show. Decorate these before putting the card together. Make sure your decorations are at the ends of the card that will slide out. They will be opposite ends.


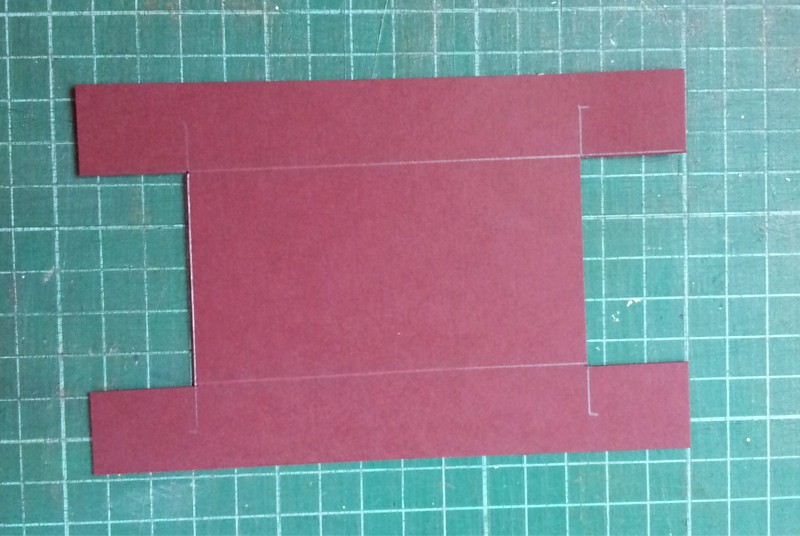
3. Cut another piece of cardstock 9cm x 14cm. This will form the base of the sliding mechanism. Take one of the smaller pieces and line it up at the bottom of the 9x14 card and make a pencil line on the larger card at the top of the smaller piece. Do the same at the opposite end of the card.
4. Find the centre point of each of the lines and measure 2.5 cm from the centre point to each end of the line. Do this at both ends of the card. Using a ruler, draw a line from one end of the card to the other end, matching the pencil marks 2.5 cm from each centre point. You will see a rectangle drawn in the centre of the card now.

5. Using scissors, cut out the small rectangle at each end of this card, making it into an H shape.


6. Take a piece of plastic almost the same width of the centre part of the H and twice as long plus about 2cm. Wrap it around the centre of the H-shaped card and tape it together loosely - it needs to be loose enough to slide around easily.


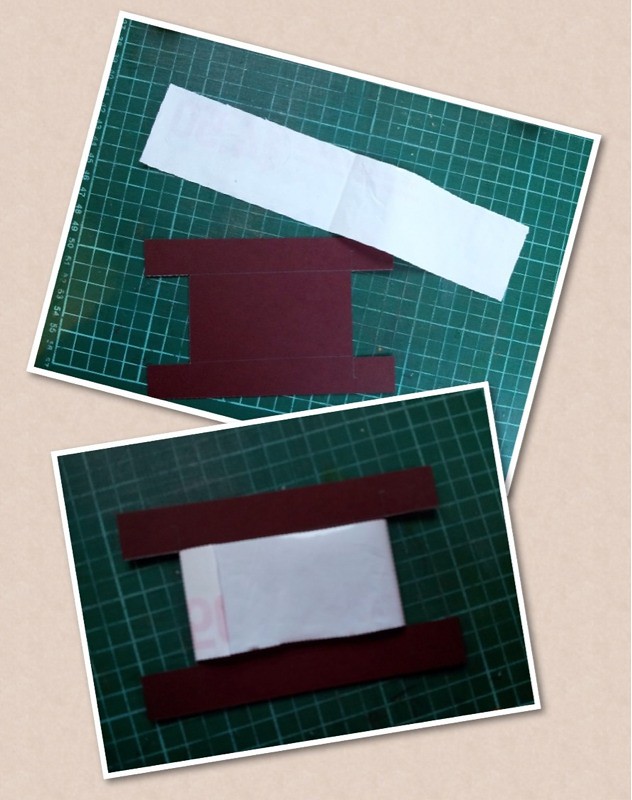
7. Place the join of the plastic at the left end of the H-shaped card. Tape the right hand slider to the top of the plastic facing you. The decorated side will be upwards. Now place the second slider part underneath the H-shaped inner piece at the left hand end with the decorated part facing up. You will only see a part of this piece. Turn the whole lot over, then tape the second decorated piece to the plastic. Note that you are taping it on the right side and will place it face down on the plastic slider. Check to see that your slider works by pulling each end out.


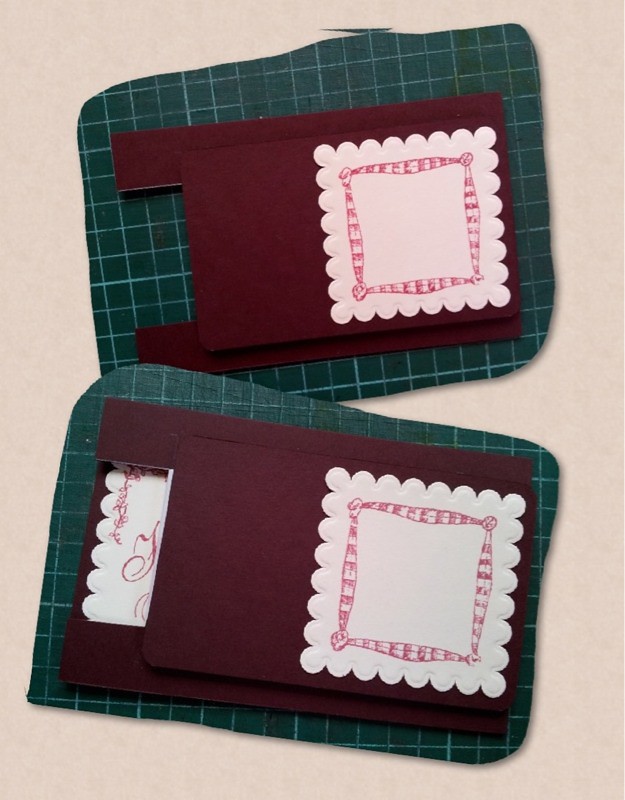
8. Turn the whole piece over and place DS tape (1/4" wide) along each long side. This is to attach to the inside of the card. Place the H-shaped inner on the card with the half circle punched out piece on the right and stick it down. Check to see that the slider mechanism works by closing the card and pulling the tab that shows through the punched half circle.


9. Place a narrow strip of DS tape along the open side of the card then stick it down. Check the slider again.

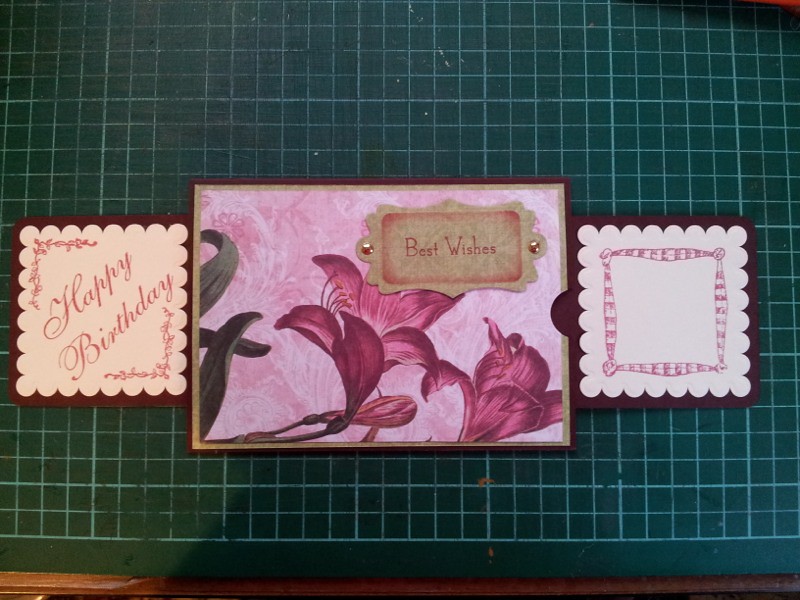
10. Finish your card off by decorating the front.


- Posted using BlogPress from my iPad

Monday, July 8, 2013

A Quick Mini-Album

Mary from SVG Cuts designed this beautiful clutch purse as part of a new set of luxury bags and this one was a freebie during the weekend.

Because I have been fixated on making journals and albums lately, I had a brainwave with this purse - make it into a mini album!

My daughter is winging her way to the USA this week to visit her cousin in New York. She loves shopping as well as travelling, so I thought this would make an ideal mini album for her to record her quick visit (only 2 weeks).

 To make it into an album, I designed some pockets to fit into the bag and attached them on the base of the bag. The pockets were made by creating a hinged piece (as you would for a book album) and adding the pockets to the hinges. (I will do a brief tutorial on how to do this later)


I then made a series of tabbed cards and tags using the leftover pieces from the bag and added plain card for journalling, so she can record her trip to New York.

I also added a magnet closure to the flap of the bag so it would stay closed.


Thursday, June 27, 2013

Happy Birthday Mum

Tomorrow is my mother's 88th birthday, so I made this card for her.The design is from SVG Cuts new set - Thank you for the Music. Just love it! If you want to see what is in the rest of this gorgeous set, check it out at SVG Cuts by clicking on the link at the right hand side of this post.

I cut all the parts from a variety of cardstock, including Dreamcatcher from First Edition Papers.

The sentiment was drawn on the card using the Cricut with a gel pen and SCAL2. The font is Trotline. I then used a thicker pen in the Cricut to draw around the shape before cutting it out with the Cricut.

Now I need to make an envelope for it as it measures 18cm x 17 cm and there are no envelopes in my stash that it will fit into!


Wednesday, June 26, 2013

Final CWC Project

Today sees the final project for this term for CWC over at My Paper Crafting. It has been great fun being part of a fabulous team of very creative people doing projects using the Cricut and the huge number of cartridges that are now available for the Cricut.

Anything goes for this project, and while I had great plans for a complicated one using lots of cartridges, unfortunately, time has got the better of me.

So, without further ado, I used the Everyday Pop-Up cards cartridge to make this card for one of my crafting buddies.

I cut the card and the teapot from some My Minds Eye designer card (Garden Tea party). I loved the wavy edge on the bottom of the card (one of the cards on the cart). I created a shadow for the teapot as well, so it stands out a little more from the card.

The flowers were punched from coloured paper andadded with some bling for the centres. Added a large gem to the top for the lid of the teapot.

On the inside, I added the Smile pop-up. The photo has shadows because of the light - but you can see how it works!


I have really enjoyed being part of Melin's little band of designers for the last year or so. It has challenged me to get more use out of my cartridges and the Cricut and I am very grateful to Melin for the wonderful designs for digital images and cutting files she has shared with us all over that time.


I hope you have enjoyed looking at the various challenges, and hopefully participating in some of them as well.

Wednesday, June 12, 2013

Just for Dad

This week's theme over at My Paper Crafting is Dad - Father's Day is coming up again!

For this card, I used the Simple Cards digi cartridge on the Cricut Craft Room when it was available as a free trial.

The background was cut as part of the actual card base and I added a patterned paper behind it along with a strip of the same paper on the top.

The easy chair is from the Father's Day cartridge and I used 2 colours/layers for this cut.

The sentiment is stamped using Gina K stamps and cut with a Spellbinders Fancy Tag die.

Please pop over to see what the other members of the DT have done and admire their stunning work!