Over at the Paper Crafting World challenge this week, we are having a colour challenge using some or all of the colours cream, yellow, orange teal and dark teal.
I found this neat Birthday Fun freebie that Melin was giving away on the blog hop at Cooking with Cricut.last weekend and used that to create the wording for this birthday card. I reduced the size of it to fit the card and cut it using my Cricut and SCAL 2. I cut the letters in orange and laid them onto a yellow backing layer. I coloured the present with a teal shade Copic marker and topped it with a cream ribbon. The balloons were partial stamped on the background layer the I paper pieced the balloons in different colours. Added a bit of sparkle to them as well!
I used spellbinders dies to create the shapes at the left side of the card, cutting them from a light teal colourded card then edging them with a distress marker to make it look stitched. The border across the top was cut from cream card using a fiskars punch then edged with the same distress marker.
Do check out the challenge for this week over at Paper Crafting World!
Over the last few years, my interests have changed a little. I have developed an interest in patchwork and quilt making which seems to have overtaken my interest in card making! I still make cards, but not as much as I used to. Hence the change name for this blog.
Tuesday, June 26, 2012
Monday, June 25, 2012
Some new cards
Got busy over the last couple of days and did a few cards.
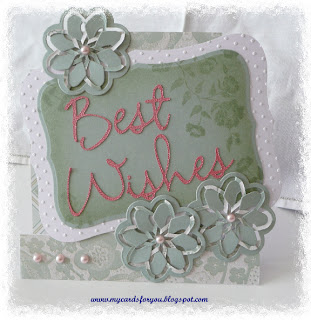
This card is a centre step card that I made as a retirement card for a friend who finishes work at the end of this week.
I cut the base card using the Black Cat and a file I did using the Funtime software. I then cut the card layers to fit and topped with a couple of layers cut with Spellbinders Labels dies. The bottom one was embossed with the swiss dots embossing folder. I cut the words using the Cricut and SCAL 2 from pink Bazzil Bling card. I stamped a floral stamp on the top layer using bundled sage distress ink.
The flowers were made using a new Spellbinders cut and fold die that I bought last weekend at the craft show in Sydney. Finished the card off with some pearl bling added to the flowers and the bottom of the card.
This is a special birthday card made for a friend of my mother. I used kraft resist cardstock to make the top layer. I stamped it with one of the new Tim Holtz stamps that I won as a prize at the class I went to in Sydney (with his lordship Tim) then embossed it with white embossing powder. I stamped flowers across the bottom of the card with black then laid a strip of cream lace across the card.
The butterflies were stamped onto glossy card with a Stamp-it stamp (that I also got at the class)then coloured using a couple of pink distress markers and water brush. Added some black bling to the centre of the butterflies after cutting them out.
To finish it off, I added some pink card candy to the corners, three little paper roses and a sentiment cut from kraft card and coloured with distress ink.
This card used the same basic techniques and materials. However, I used a different sentiment stamp and die cut and left off the roses.
Both cards were layered with black onto a pink base card.
Tuesday, June 19, 2012
Another Challenge - All things Men
The theme for the weekly Tuesday challenge over at Paper Crafting World this week is All things Men - a masculine theme.
I used Melin's cute King of the Grill digi set to make this one. For the background, I created a wood effect by scoring the background card then inking it with several layers of distress inks to produce a stained timber look. I then added a side piece of a printed house and cut a picket fence, which I embossed with a Sizzix Alterations folder. I added distress ink to the fence as well.
The image was colour printed from the digi set here, then I used my Black Cat Cougar to do a print and cut. I was very pleased with the result of the cutting.
The sentiment was included with the digi file so I printed it out separately and cut it then attached it to the top of the card.
Please visit all my DT friends at PWC and Cooking with Cricut to see what they have done for the theme this week.
Monday, June 18, 2012
Class with Tim Holtz
Yesterday morning, I went to a class with Tim Holtz in Sydney. What an amazing experience it was! Tim is such an amazing teacher - patience, humour, empathy!
We made this Flight of Fancy project. Mario must have spent hours putting the kits together.

Tim gave us all a bag to take our goodies away in. We also each got a craft apron from Ranger and I won a prize - a set of stamps from Stampers Anonymous - Attic Treasures.
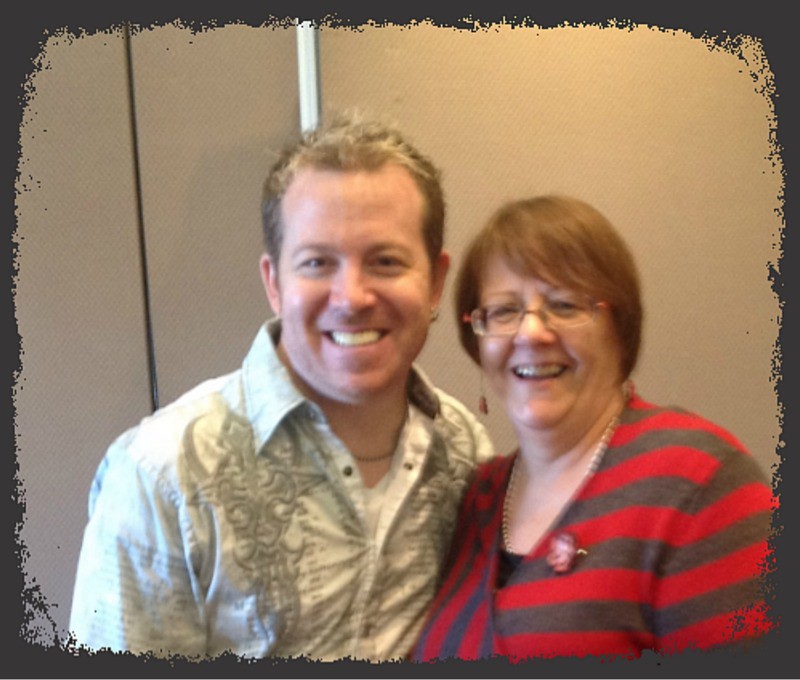
We also got an opportunity for a photo at the end of the session, and of course most people lined up for pics and signings of books, bags etc.
Posted using BlogPress from my iPad
We made this Flight of Fancy project. Mario must have spent hours putting the kits together.

Tim gave us all a bag to take our goodies away in. We also each got a craft apron from Ranger and I won a prize - a set of stamps from Stampers Anonymous - Attic Treasures.
We also got an opportunity for a photo at the end of the session, and of course most people lined up for pics and signings of books, bags etc.

Posted using BlogPress from my iPad
Location:Sydney, Australia
Friday, June 15, 2012
ATC Swap
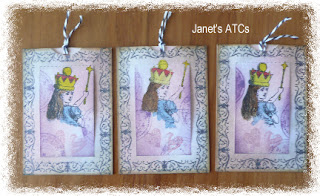
I hosted an ATC swap with some of my friends on the Card Making World NZ Crafters group recently. I decided to make my ATCs a little different this time and added a pull out mechanism that enabled the centre of the ATC to fold in the middle to expose a message.
I made a cutting file with my Funtime software then cut it with the Black Cat. The stamps are from a Greetings from Wonderland set that I bought in the UK in April. The images were coloured using distress reinkers and a water brush.
Enjoyed playing around with these.
I made a cutting file with my Funtime software then cut it with the Black Cat. The stamps are from a Greetings from Wonderland set that I bought in the UK in April. The images were coloured using distress reinkers and a water brush.
Enjoyed playing around with these.
Tuesday, June 12, 2012
A New Challenge
The theme for the challenge over at Paper Crafting World this week is vacations. What better way of spending one's vacation than at the beach?
I used Melin's Playing in the Sand cutting files to create this scrapbook layout. If you have been following my blog for the past couple of years, you will know that I don't do scrapbooking, but I decided to give it a go for this week's challenge!
The sand coloured pieces were all cut from Bazzill Bling and were edged with pumice stone distress ink before layering them up together.
The little girl bear was cut from Bazzill Basic (Pinecone) and edged with vintage photo before putting together.
All the elements were cut with the Cricut Expression using SCAL2.
Please go over to the challenge which is here, and have a look at the other DT examples and have a go at the challenge as well!
Wednesday, June 6, 2012
PCW Challenge - Wedding theme
The theme for the challenge over at Paper Crafting World this week is Weddings! And wow - this also coincides with my 200th post on my blog!
I found this neat cutting file created by Melin here. I cut the card from white cardstock then cut the layers from pink bazzil cardstock. The decorations on the cake were cut from a deeper shade of pink and I added Kindi glitz to make them sparkle before I attached them to the cake!
I added some pearl strips from Kaiser across the middle layer of the cake to add some extra dimension.
The base of the cake has been embossed with silver embossing powder - I did it a couple of times to add some extra shine. I then added some silver peel-off strips across the very bottom of the base.
The sentiment stamp is from Montarga and I stamped it then cut the fancy tag using a spellbinders die in my Cuttlebug.
Check out some of the other great samples from the rest of the DT over at Cooking With Cricut.
Tuesday, June 5, 2012
Creating again!
I was having a browse through some of my Craft Stamper magazines recently when looking for inspiration. I found a great banner project that looked like something I could do as I had most of the basic materials needed to complete it.
This is what I came up with:

I used:
Grunge board letters; distress inks; buttons; pen nibs (rescued when cleaning out my parent's house); die cut cogs, glassine paper flowers, key, rosette and bird; old music paper for the frills; lace; chain; eyelets; alcohol ink, a wire heart shape; metal embellishments; Glossy accents; Stampers Anonymous stamp sets.

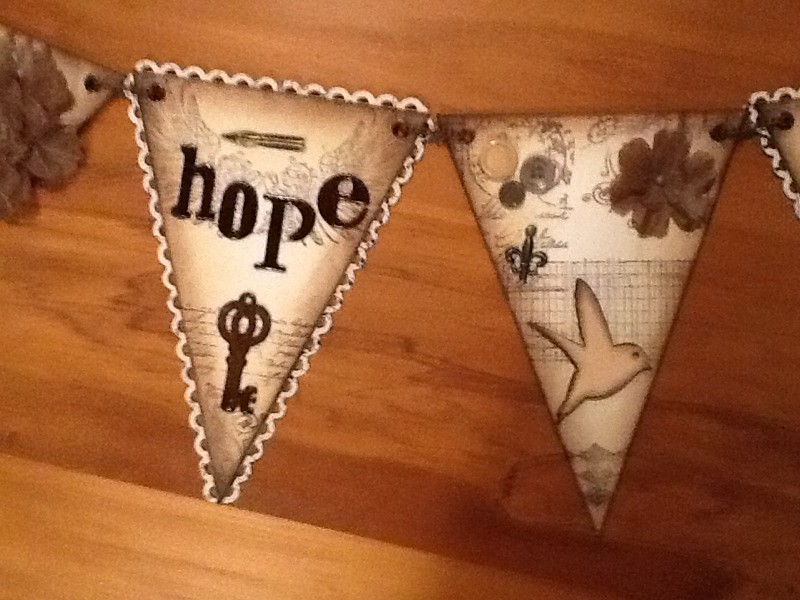
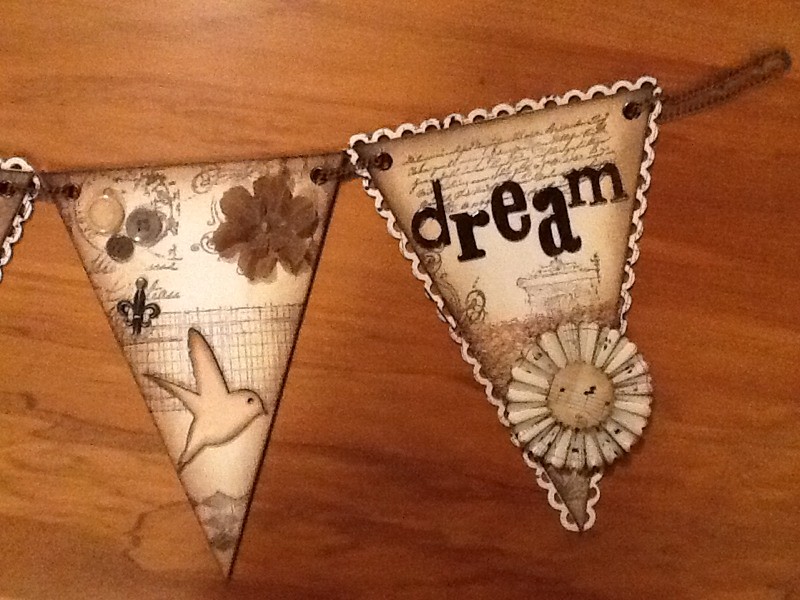
I really enjoyed doing this project.
- Posted using BlogPress from my iPad
This is what I came up with:

I used:
Grunge board letters; distress inks; buttons; pen nibs (rescued when cleaning out my parent's house); die cut cogs, glassine paper flowers, key, rosette and bird; old music paper for the frills; lace; chain; eyelets; alcohol ink, a wire heart shape; metal embellishments; Glossy accents; Stampers Anonymous stamp sets.


I really enjoyed doing this project.
- Posted using BlogPress from my iPad
Subscribe to:
Comments (Atom)

