Here are two of the cards I made for the meeting.


Instructions:
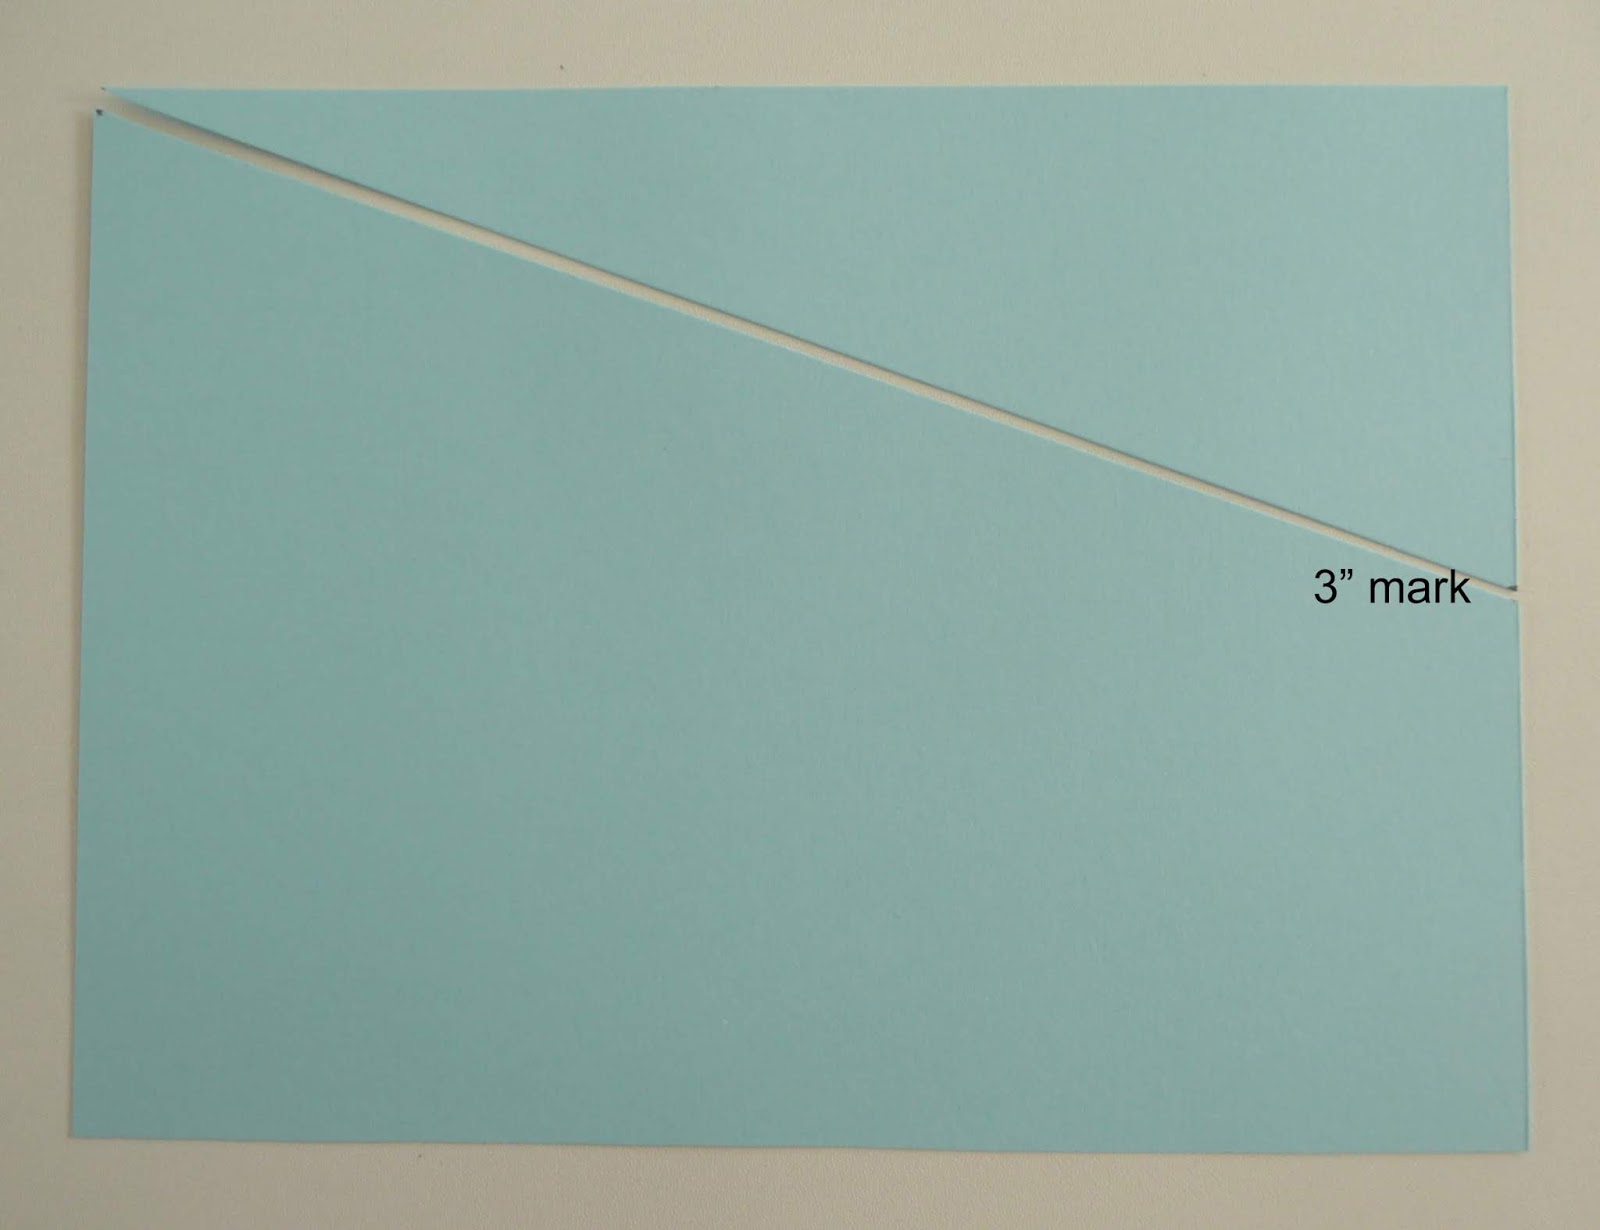
Cut 2 pieces of card – 6” x 8”
Measure down 3” on one of the 6” sides and make a mark.
Repeat for the other piece of card.
 Cut the top
off the card from the top of the card opposite the mark down to the mark at 3” on the 6” side.
Keep the offcut for decorations. Repeat for other piece of card.* You could use decorative scissors, edge dies or edge punches to do this.
Cut the top
off the card from the top of the card opposite the mark down to the mark at 3” on the 6” side.
Keep the offcut for decorations. Repeat for other piece of card.* You could use decorative scissors, edge dies or edge punches to do this.
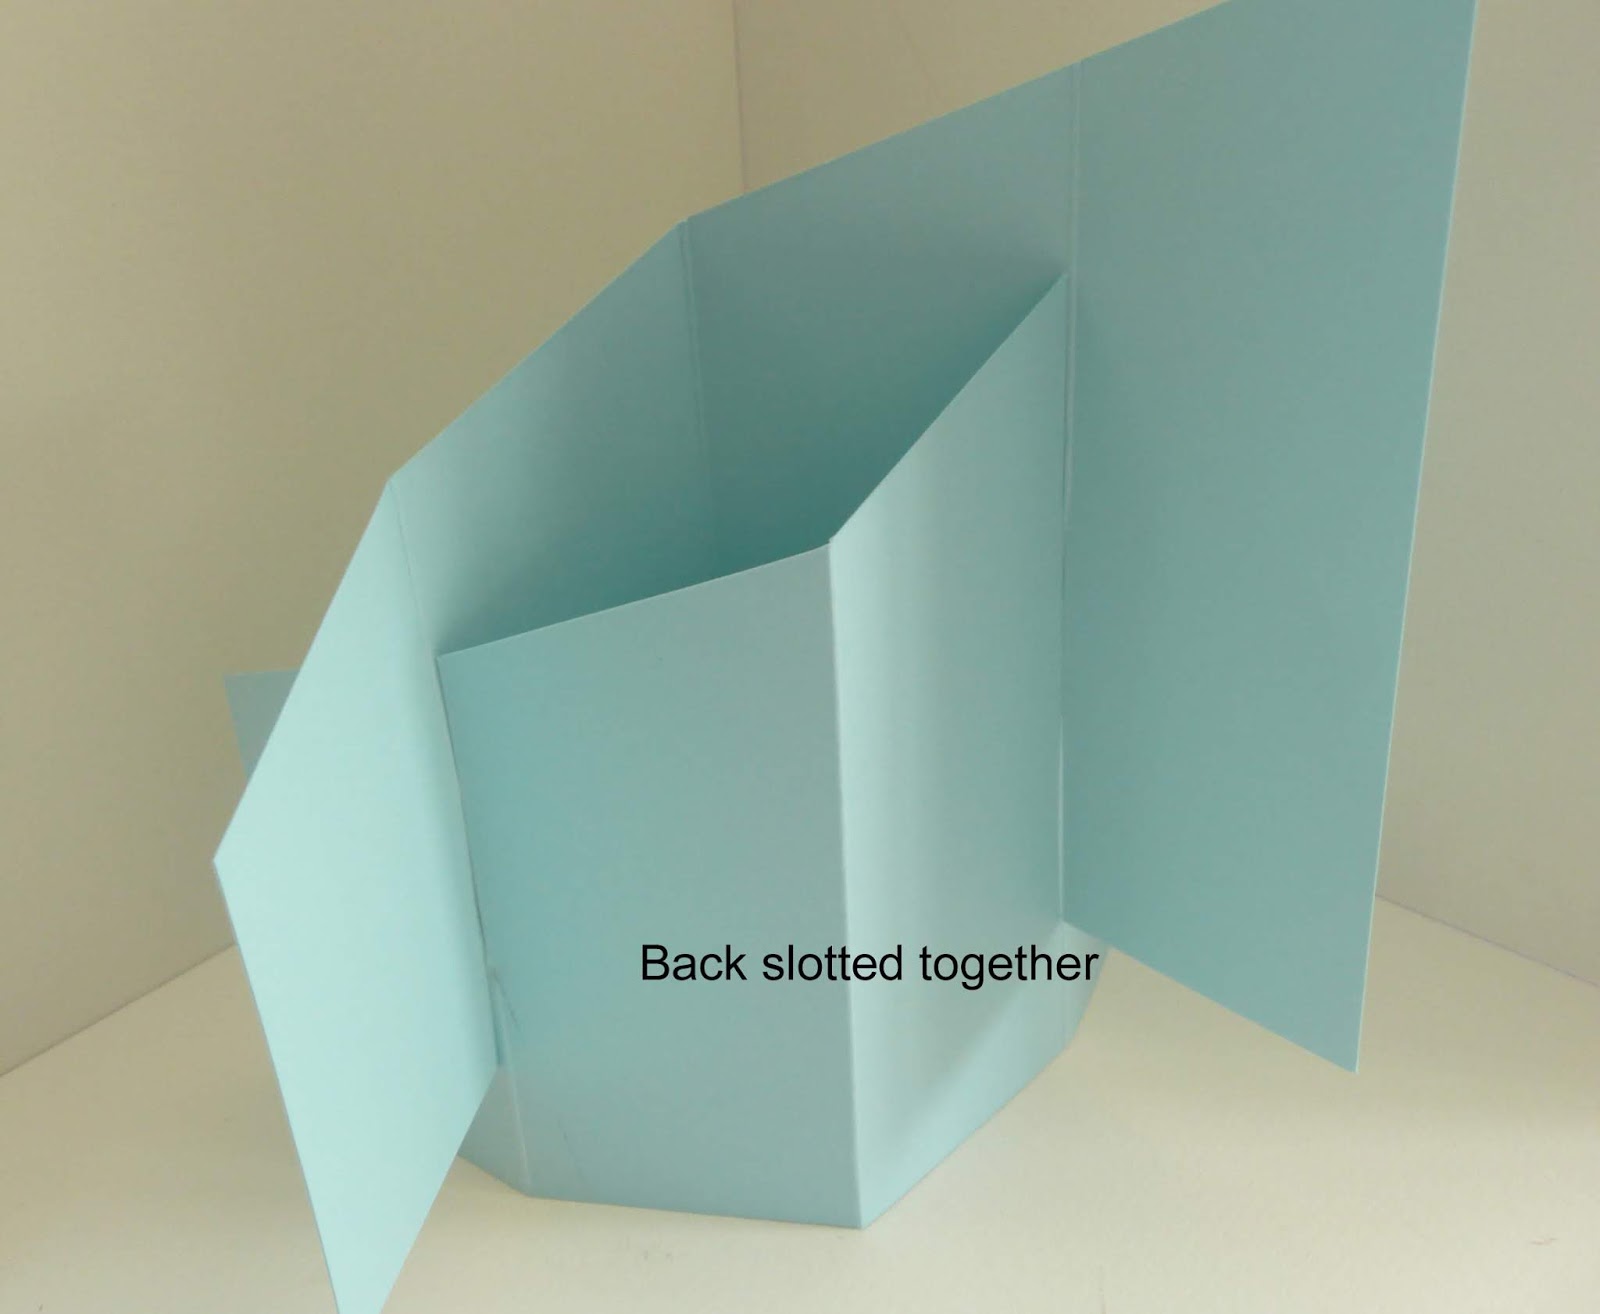
Score on the
straight 8” edge at 2”. 4” and 6” on both pieces.

On one
piece, cut along the 2” and 6” scorelines
from the
bottom to about halfway along the scored lines.
On the other
piece, cut from the sloped edge along the
2” and 6” scorelines to about halfway along
the scored lines.


Push the two sides together so both are sitting on the table evenly. If they will not do this, you may need to snip the cuts on the folds a little further.
 Cut two
pieces of double sided designer paper at 6” x 8”. Cut as for the base card to
*, with the back sides of the paper facing the other to provide a mirror image.
Cut two
pieces of double sided designer paper at 6” x 8”. Cut as for the base card to
*, with the back sides of the paper facing the other to provide a mirror image.
Cut each
piece at 2”, 4” and 6” so they are the same size as the folded pieces of the
base card.
 Place each
piece where you would like it, making use of the pattern on the reverse to
provide a contrast. Trim a little (between ⅛” and ¼”) from the side and
bottom of each piece so that when you attach it to the base card, there is a
narrow border around each piece.
Place each
piece where you would like it, making use of the pattern on the reverse to
provide a contrast. Trim a little (between ⅛” and ¼”) from the side and
bottom of each piece so that when you attach it to the base card, there is a
narrow border around each piece.
Decorate as
desired using stamped and die cut flowers, die cut labels, stamped sentiment as
appropriate. You can add a panel on the back to write a greeting on and this
will make the card more stable.
If you make this card, please leave a comment below. Thank you.
No comments:
Post a Comment