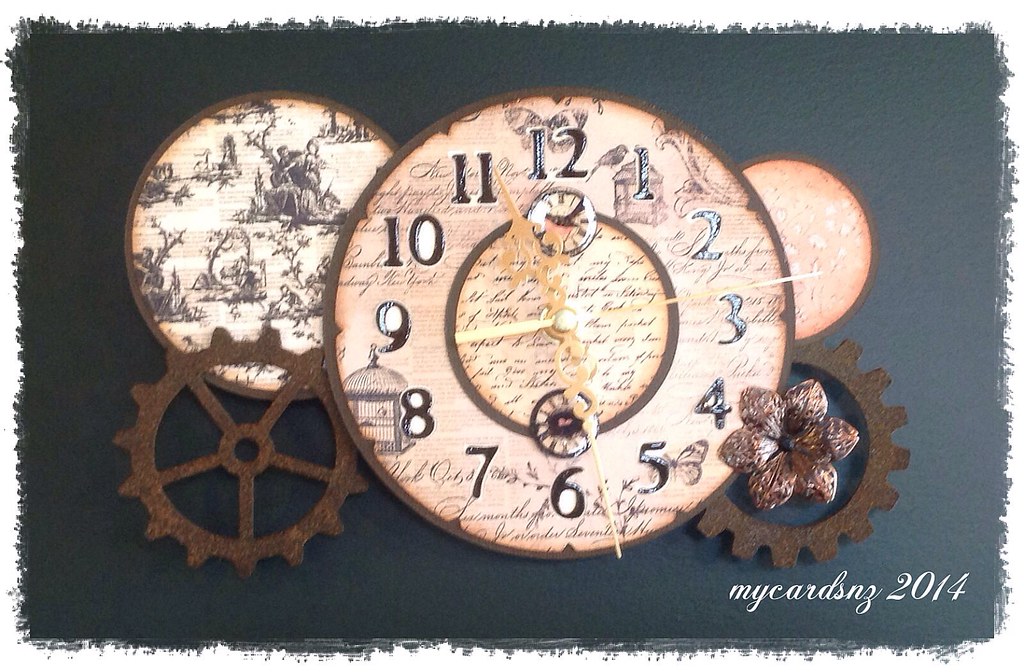
Over the last few years, my interests have changed a little. I have developed an interest in patchwork and quilt making which seems to have overtaken my interest in card making! I still make cards, but not as much as I used to. Hence the change name for this blog.
Recently, I bought some files from SVG Cuts including the set Maison de Madelaine. One of the files in the set was for this clock.
I cut the files on my trusty Cricut expression machine using a 6x6" paper pad (Almanac Collection by Prima) for the clock face and other pieces. The cogs were cut from lightweight chipboard and I layered several layers to make them reasonably stable and to stop them from bending. I used vintage photo distress embossing powder on the cogs to give them a slightly rusted look.
I used a clock movement I bought from Spotlight to complete the clock. It now rests very nicely on the wall in our dining room!
If you want to check out the wonderful cutting files and sets from SVG Cuts, please use the direct link on the top right hand side of my blog.
I found the design to be easy to make and decorate, but found that I had to reduce the size of the pictures so they would fit onto the mats. Also, the folded mats for the narrow pockets - when they had photos attached, they were a tight fit in the slots. However, the end result was pleasing and Mum liked it a lot!
Over the last few days I have been making a few cards, many of which have been inspired by articles in recent Craft Stamper magazines.
Both of these cards are based on a sample of a man's card. I used mesh tape (from the local hardware store) for the centre part of the cards. I covered it with embossing ink then heat embossed it with silver embossing powder. The backgrounds were embossed using a Cuttlebug folder. The cogs were cut from dark silver/grey metallic card. The base cards used were both white.
The next card was a nice CAS card using distress inks to create a rectangular background then stamped with contrasting colours of Memento inks. The same inks were used to highlight the edges of the background area. The leaf stamps were from Gina K and Tanda.
The final card is one for which I used the cover stamp from the latest magazine. I just love Rennie-Mackintosh style designs and was very pleased to get this stamp! I used the stamp with London Fog Memento ink to stamp the background images and coloured the focal image with distress inks.
Recently I found a You Tube video demonstrating a double fold card that looked really nice so tried the technique out after playing with the measurements to suit the size of cards that i usually make.
For this card, I used a wine coloured base card and used an edge punch to shape the sides. I cut the label shapes from the wine card and a contrasting card and stamped with Memento Rhubarb ink. The labels were attached to the belly band around the centre of the card. This comes off to open the cards.
I used an edge die to shape the sides of this card and embossed it using white chalk ink. The flower was hand made using paper punched with a large flower punch. The ribbon is threaded through the sides of the die cut part of the card and tied into a bow.
Recently a small group from the Card Making World NZ Crafters forum had a tag swap with the theme of Quotes.
These are the five tags I made for the swap. The techniques used are all from Tim Holtz On Line workshop I did last year. Many of the stamps used are also from Tim Holtz.
Finally I have finished the third video in the series on making the mini album.
There will be at least 2 more in this series because of the limited length I can make them!
This video is focussed on adding the layers to the basic pages.
The instructions for cutting the layers to the correct size follow.
These instructions cover only the basics of adding layers to
each section of your album. The finishing touches are yours to imagine and
implement! If you wish, you can add distress ink of appropriate tones to the
top layers. It is suggested you do this before attaching to the pages!
I use glue to attach my layers as it allows for a bit of
“wiggle time” to make sure the layer is in the right place before finally
firming it down.
Page 1
Note: all pieces are 4 ¾” wide to fit onto a 5” wide page.
The instructions given are for the length of each piece. It is suggested that
you cut 12” by 12” paper into strips of 4 ¾” and cut the lengths according to
the directions.
These will attach to the 3 panels on this page. Tuck the
bottom of the two smaller pieces underneath the top of the panel just below the
one you are attaching it to.
Page 2
All pieces are 4 ¾” wide to fit onto a 5” wide page.
Cut: 1 piece @ 2 ½”; 1 piece @ 4 ⅛”
These two attach to the 2 panels on this page.
Page 3
Cut the same pieces as for page 2 and attach.
Page 4
Cut 1 piece @ 6 ¾” and attach to the page before adding the
smaller folder piece. Measure the folder piece for the size of the top layer
and attach.
For all other pages and inserts, measure the size of the
page or insert and reduce the size by ¼” on the width and ¼” on the length.
This will allow a ⅛” margin all around the page.